Welcome! This guide is designed to help you understand everything you need to know about how to get asbestos tested safely and effectively. Whether you’re planning renovations, managing a rental property, or simply concerned about asbestos in your home or workplace, we’re here to provide clear, reliable information to protect your health and ensure compliance with New Zealand’s safety regulations. Let’s get started on keeping your environment safe and asbestos-free.
If you’re planning renovations, repairs, or demolition on an older property in New Zealand, understanding how to get asbestos tested is essential before any work begins. Asbestos testing isn’t optional guesswork—it’s a critical safety step that protects everyone involved in the project, from your family to tradespeople.
Table of Contents
Key Takeaways
- Only laboratory analysis can confirm whether building materials contain asbestos. Visual inspection alone is never sufficient, regardless of experience level.
- Homeowners, landlords, and business owners in New Zealand have legal duties under the Health and Safety at Work Act 2015 and Residential Tenancies Act 1986 (including 2019 amendments) to manage asbestos risks in their properties.
- Safe asbestos testing involves three stages: identifying suspect materials, arranging a qualified surveyor to collect samples, and having them analysed by an IANZ-accredited laboratory.
- DIY sampling is strongly discouraged because incorrect handling can release dangerous airborne asbestos fibres, contaminate your home, and invalidate insurance or compliance requirements.
- This article walks you through recognising risk, booking professional testing, understanding your results, and determining what to do next if asbestos is confirmed.
Why Asbestos Testing Matters Before Any Work
Asbestos-related disease remains the leading cause of work-related deaths in New Zealand. Many cases are linked to older homes and workplaces where asbestos containing materials were disturbed without proper precautions.
Asbestos was widely used in New Zealand building materials from the 1940s through to the late 1990s. Any property built or renovated before 1 January 2000 should be checked before invasive work begins. The health risks are severe: exposure to asbestos dust can lead to mesothelioma, asbestosis, and lung cancer, with symptoms often not appearing until 20-50 years after initial exposure.
Activities that seem routine can release invisible fibres if materials contain asbestos:
- Sanding walls or ceilings
- Drilling holes for fixtures
- Cutting through cladding or flooring
- Waterblasting exterior surfaces
- Demolition of any kind
Common projects that require asbestos checks include:
- Removing textured ceilings (often called “popcorn” or Artex-style finishes)
- Replacing decramastic roof sheeting or tiles
- Renovating bathrooms with old vinyl floor coverings or fibre-cement linings
- Rewiring or replumbing that requires cutting through walls
- Kitchen renovations in pre-1990s homes
- Any demolition work on older structures
Testing connects directly to compliance obligations. Under the Health and Safety at Work Act 2015, those who control workplaces must identify asbestos and manage asbestos risks appropriately. For landlords, the Residential Tenancies Act and its 2019 amendments create specific duties around disclosure and management. Fines for unmanaged contamination can be substantial, and the reputational and legal consequences of accidental asbestos exposure during unplanned work can follow property owners for years.
Step 1: Work Out if Your Property Is Likely to Contain Asbestos
Before you touch anything, remember this fundamental rule: do not disturb any suspect material while assessing whether your property may contain asbestos. Even small disturbances can release fibres.
The age of your building is the first and most reliable indicator. Properties built or substantially renovated before the late 1990s in New Zealand should be treated as “suspect” until professionally checked. This includes buildings that may have had additions, alterations, or repairs during that era.
Typical asbestos-containing materials found in New Zealand properties include:
| Material Type | Common Locations |
|---|---|
| Fibre-cement cladding and soffits | External walls, eaves, garage linings |
| Decramastic roofing tiles | Roof surfaces on 1960s-1980s homes |
| Textured “stucco” or Artex-style ceilings | Living areas, bedrooms, hallways |
| Vinyl flooring with felt backing | Kitchens, bathrooms, laundries |
| Fuse boards and electrical backing | Meter boxes, switchboards |
| Pipe lagging and insulation | Hot water systems, heating ducts |
| Fireproof panels | Behind wood burners, near heaters |
| Asbestos cement sheets | Interior linings, wet area walls |
Building records can provide valuable clues. Look for:
- Original building permits and specifications
- Council consent documentation
- Previous asbestos surveys from earlier renovations
- Records from work done in the 1970s-1990s
If you cannot determine whether a material is safe with the naked eye, you must assume it may contain asbestos and arrange professional testing. Never scrape, break, or collect your own samples to “check” what something is made of. This approach creates exactly the exposure risk you’re trying to avoid.
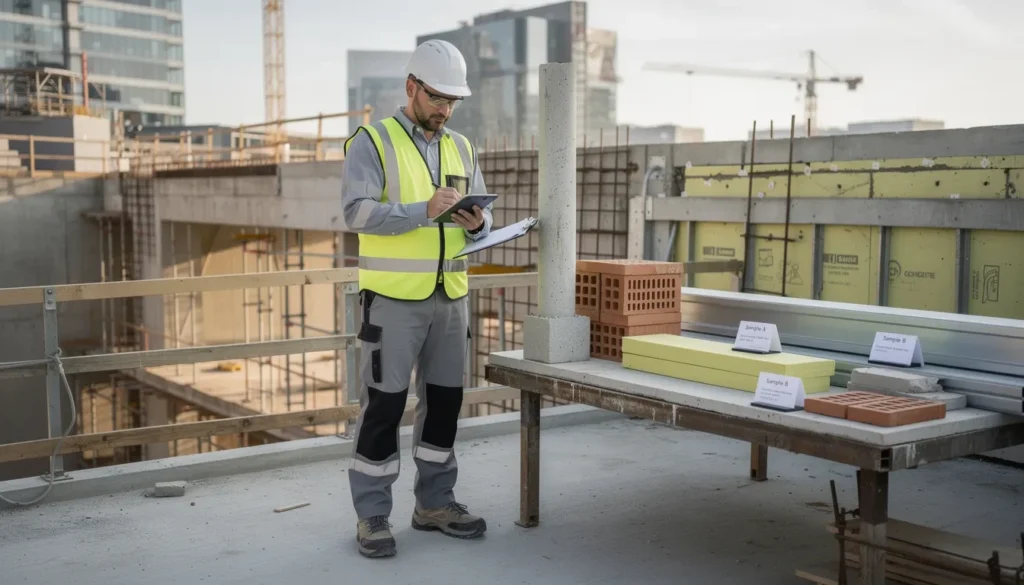
Step 2: Choose the Right Asbestos Testing Service
Understanding who does what helps you make informed decisions. An asbestos surveyor inspects your property and collects samples. An analytical laboratory tests those samples to identify asbestos. These may be different organisations, or some companies offer both services.
In New Zealand, bulk sample analysis should be carried out by an IANZ-accredited laboratory. This accreditation ensures the lab follows standardised methods and quality controls. Generic “test kits” purchased online do not meet these standards and their results may not be accepted for compliance purposes.
When choosing a surveyor, look for:
- Recognised New Zealand asbestos survey training and qualifications
- Experience with similar property types (pre-1985 houses, commercial buildings, schools)
- Current professional indemnity and public liability insurance
- Membership of relevant professional bodies
Ask potential providers whether they can complete:
- Asbestos management surveys (identifying and assessing ACM in occupied buildings)
- Refurbishment and demolition survey work (more invasive, required before major works)
- Air monitoring during and after removal projects
- Development of an asbestos management plan if required
Before booking, obtain a clear written quote that sets out:
| Cost Component | Typical Inclusions |
|---|---|
| Call-out fee | Travel time, site attendance |
| Survey fee | Visual inspection, risk assessment |
| Per-sample lab fee | Number of samples included |
| Turnaround time | Standard (3-5 working days) vs urgent (24-48 hours) |
| Report format | IANZ accredited report, recommendations |
Getting this information upfront prevents surprises when the invoice arrives.
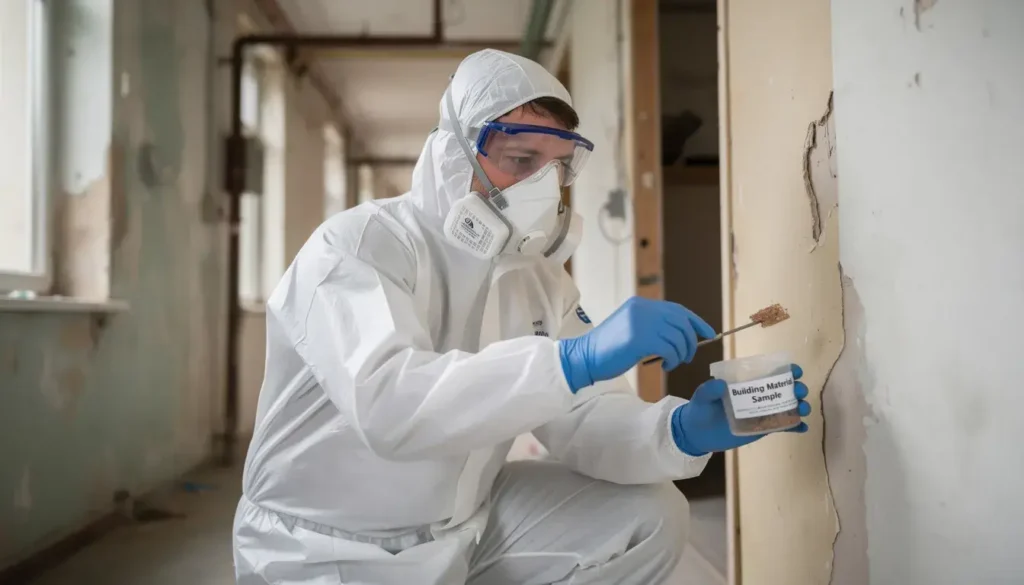
Step 3: How Professional Asbestos Sampling Works
Only trained professionals should collect samples because they use protective equipment and techniques that minimise fibre release. This isn’t about creating unnecessary barriers—it’s about preventing the very exposure the testing is designed to assess.
During a typical site visit, the surveyor will:
- Conduct a visual inspection of likely asbestos materials throughout the property
- Identify discreet sample points that provide representative material without major damage
- Use hand tools to carefully remove small pieces of material
- Apply wet methods and plastic sheeting where appropriate to contain any dust
The surveyor will typically wear at least a P2 or P3 respirator and disposable coveralls. This protective equipment isn’t theatrical—it’s based on evidence about how fibres behave during sampling.
Samples are sealed in clearly labelled containers that are double bagged to prevent cross-contamination. Each sample record includes:
- Date and time of collection
- Exact location within the property
- Material description and condition
- Sample reference number for chain-of-custody tracking
For larger projects—such as a demolition survey of an office block or school—systematic sampling across rooms and floors follows an agreed survey strategy. This might involve dozens of samples rather than the handful needed for a typical house renovation.
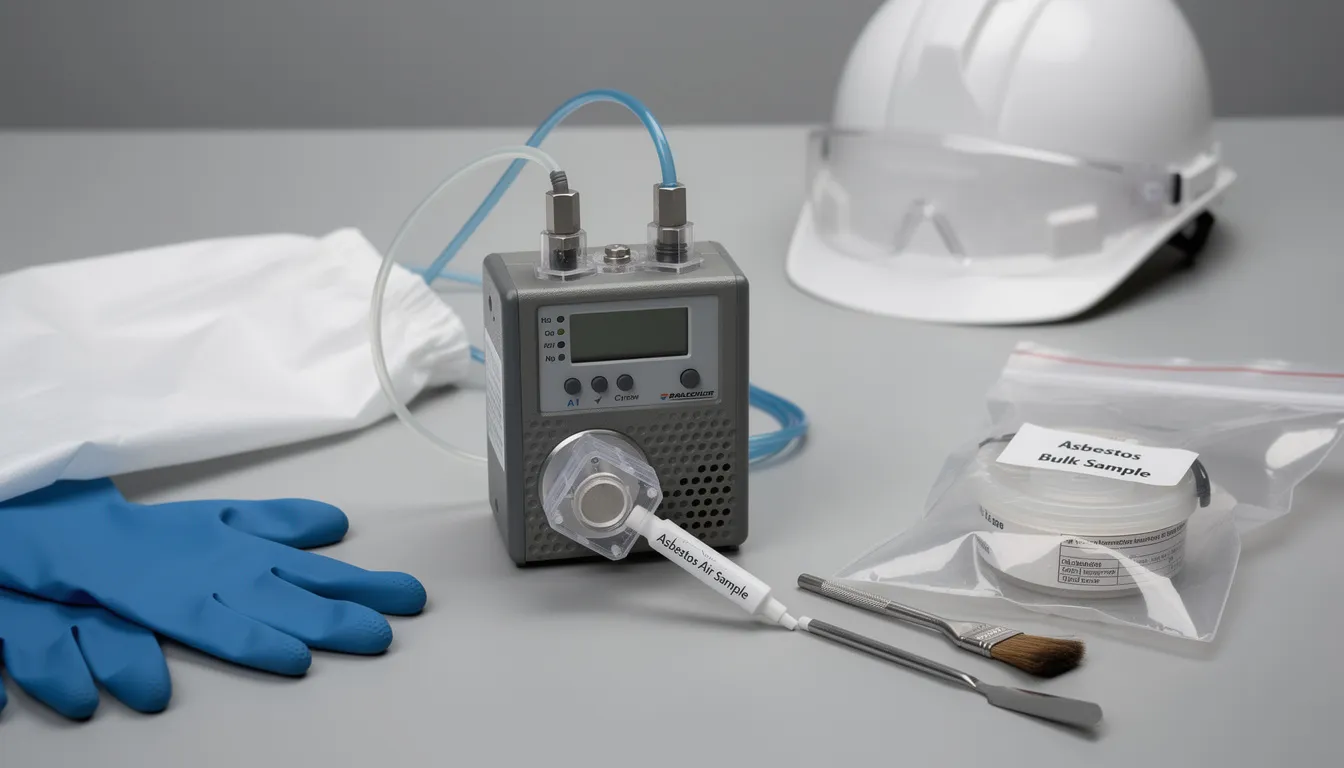
Step 4: Laboratory Testing and Understanding Your Results
Once samples arrive at the laboratory, trained analysts prepare and examine them using specialised techniques. The primary method is polarised light microscopy (PLM), which can identify the presence of chrysotile, amosite, crocidolite, and other asbestos types based on their unique optical properties.
The qualitative identification process involves examining fibre morphology, refractive index, and other characteristics under magnification. For most bulk samples from building materials, PLM provides reliable results with a detection threshold around 1% asbestos content.
A standard asbestos report will include:
- List of all samples collected with reference numbers
- Whether asbestos was detected in each sample
- Type of asbestos identified (if present)
- Approximate content level (trace, low, moderate, high percentage)
- Description of the material sampled
- Condition assessment and risk ranking
Understanding what results mean requires careful reading. A result showing “no asbestos detected” applies only to the specific material sampled. Other areas of the same property—or even different sections of seemingly similar material—may still contain asbestos and should be considered separately.
Pay attention to any risk assessment in the report. This typically distinguishes between:
| Classification | Description | Typical Recommendation |
|---|---|---|
| Friable asbestos | Easily crumbled, high risk of fibre release | Usually requires removal before work |
| Non-friable asbestos (good condition) | Bonded asbestos, intact, sealed | May be left in place and managed |
| Non-friable asbestos (poor condition) | Damaged, weathered, or deteriorating | May need encapsulation or removal |
For complex reports covering multi-storey commercial buildings or properties with numerous sample locations, ask the testing provider to walk you through the findings. Understanding the implications of each result helps you make informed decisions about next steps.
Step 5: What to Do If Asbestos Is Found
The presence of asbestos does not automatically mean you need to tear everything out immediately. Many properties across New Zealand safely contain bonded asbestos materials that have been in place for decades without causing harm—because they remain undisturbed.
The main management options depend on material condition and your planned work:
Leave in place and monitor: Suitable for intact, non-friable materials that won’t be disturbed. Regular inspections confirm the material remains in good condition.
Encapsulate or seal: Applying protective coatings or covering materials can prevent fibre release. This approach works for some non friable asbestos in reasonable condition.
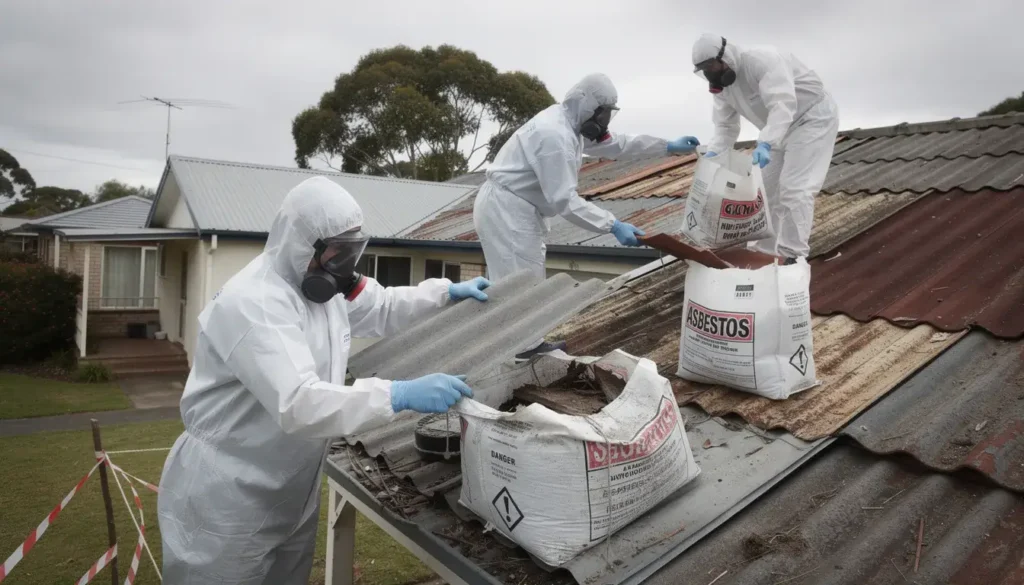
Licensed asbestos removal: Required when materials are friable, damaged, or will be disturbed by renovation or demolition. This is the most definitive solution but also the most expensive.
For workplaces and rental properties, an asbestos management plan is usually required once asbestos present has been confirmed. This plan includes:
- A register of all identified asbestos locations
- Risk assessment for each material
- Control measures to prevent disturbance
- Procedures for planned maintenance or emergency response
- Review and update schedules
Only licensed removalists should handle friable asbestos and higher-risk removal work. WorkSafe NZ maintains a register of licensed asbestos removal contractors, and using unlicensed operators creates both safety and legal risks.
Once asbestos removal or encapsulation is complete, an independent assessor should conduct air monitoring or a clearance inspection. This confirms that no residual contamination remains and the area is safe for reoccupation. Clearance certificates provide documented evidence that proper procedures were followed.
DIY Asbestos Test Kits vs Professional Testing
Online DIY asbestos sampling kits exist and are marketed as a cheaper alternative to professional services. While acknowledging their presence, there are significant reasons why they’re problematic in the New Zealand context.
Key risks of DIY asbestos sampling include:
- No respiratory protection: DIY samplers typically lack appropriate P2/P3 respirators and protective clothing
- Incorrect technique: Without training, fibres can be released unnecessarily during sample collection
- Contamination spread: Asbestos fibres can become embedded in carpets, soft furnishings, and clothing
- Health and safety breaches: DIY sampling may not meet workplace health and safety expectations
- Invalid results: Poor sampling technique can lead to false negatives or contaminated samples
Some accredited laboratories will reject DIY samples that arrive contaminated, improperly sealed, or inadequately labelled. This creates delays and additional costs while leaving you uncertain about your property’s actual status.
Professional surveyors provide chain-of-custody documentation that tracks samples from collection through analysis. This creates reliable, defensible evidence that may be required for:
- Tenancy disputes where contamination is alleged
- Insurance claims related to asbestos damage
- Council compliance documentation
- Workplace health records
- Court proceedings if exposure leads to illness
For both public health protection and legal compliance—particularly before any structural work—professional asbestos sampling and testing is the clear recommendation.
How Much Does Asbestos Testing Cost in New Zealand?
Costs vary by region, property type, and number of samples required, but understanding typical ranges helps you budget appropriately.
Laboratory analysis fees:
| Service Type | Typical NZ Range |
|---|---|
| Bulk sample (PLM method) | $35-70 per sample |
| Urgent turnaround (24-48 hours) | Additional $30-50 per sample |
| Air sample analysis (membrane filter method) | $80-150 per sample |
| Soil samples | $50-100 per sample |
Survey and call-out fees:
| Service | Typical NZ Range |
|---|---|
| Standard residential call-out | $100-250 |
| Survey fee (residential) | $150-400 |
| Commercial survey | $400-1500+ depending on size |
| Remote location surcharge | $50-200+ |
For a standard three-bedroom house, you might expect:
- 4-6 bulk samples (textured ceiling, bathroom linings, vinyl flooring, external cladding)
- Survey and lab analysis combined: approximately $400-700
- Urgent turnaround adds $150-300
These costs should be weighed against potential consequences of proceeding without testing:
- Accidental contamination cleanup: $5,000-50,000+
- Project delays while emergency assessment is conducted
- WorkSafe NZ fines for non-compliance
- Personal injury claims if workers are exposed
- Insurance policy exclusions if proper procedures weren’t followed
Testing expenses are a small fraction of renovation budgets and provide certainty that protects everyone involved.
Preparing Your Home or Workplace for Asbestos Testing
A little preparation helps the surveyor work more efficiently and safely on the day of testing, potentially reducing costs and improving results.
Before the surveyor arrives:
- Clear access to suspected materials without scraping, breaking, or disturbing anything
- Move furniture away from textured ceilings or walls to be sampled
- Clear cupboards where vinyl flooring or cement sheeting may be sampled
- Ensure adequate lighting in areas to be inspected
During the visit:
- Keep pets, children, and non-essential staff out of rooms where sampling occurs
- Remain available to answer questions about building history and previous work
- Don’t attempt to “help” by touching materials yourself
Documentation to prepare:
- Building plans and specifications if available
- Council consent records for previous renovations
- Earlier asbestos surveys or reports
- Records of any work done in the 1970s-1990s
The surveyor will typically clean up minor debris from sampling, but small patched spots may remain where material was removed. Note these locations if you’re planning decorating work afterwards.
Frequently Asked Questions About Asbestos Testing and Management
Can I tell if something contains asbestos just by looking at it?
No. Visual inspection alone cannot confirm whether a material contains asbestos because asbestos fibres are microscopic—invisible to the naked eye. Many asbestos products look identical to non-asbestos versions. Even fibre-cement sheets manufactured with and without asbestos can appear the same.
Experienced surveyors use visual assessment to identify suspect materials, but they rely on lab analysis to confirm the presence of asbestos. Any “guess” without testing should not be used for safety decisions. If there’s any doubt, treat the material as potentially contaminated until a sample is taken and tested by an accredited laboratory.
How long does asbestos testing usually take from start to finish?
A typical New Zealand timeline looks like this:
- Booking a surveyor: Often within a few days, though busy periods may extend this
- Site visit: 1-3 hours for a standard house, longer for commercial properties
- Lab analysis: 3-5 working days for standard turnaround
- Total time: Usually 1-2 weeks from initial contact to receiving results
Urgent analysis is available with 24-48 hour turnaround for an additional fee. This is useful when builders are waiting to start work and delays are costly.
Never begin demolition or major renovation until you’ve received and understood the final written asbestos report. Starting work “while we wait for results” defeats the purpose of testing.
Do I have to remove asbestos if it is found in good condition?
New Zealand asbestos regulations do not automatically require removal of all asbestos. Intact, sealed materials that are unlikely to be disturbed can often be left in place and managed safely through an asbestos management plan. However, if asbestos removal is required, it’s important to consult asbestos removal specialists to ensure safe and compliant handling.
Removal usually becomes necessary when:
- Materials are damaged, weathered, or in poor condition
- The asbestos is friable (easily crumbled)
- Planned refurbishment or demolition will disturb the material
- Services work like rewiring or replumbing requires cutting through ACM
Discuss your options with your asbestos professional. For workplaces and rental properties, update the asbestos register and management plan if asbestos is left in place, and ensure anyone who might disturb these materials is informed.
Is air testing needed if I only want materials checked before renovation?
Bulk sample analysis and air monitoring serve different purposes:
- Bulk testing: Identifies whether solid materials contain asbestos
- Air monitoring: Measures airborne asbestos fibres during or after work
For pre-renovation checks, bulk sampling of suspect materials is usually sufficient. You’re trying to identify whether asbestos is present before any disturbance occurs.
Air tests are generally needed:
- After licensed asbestos removal as part of clearance procedures
- When accidental damage to friable materials is suspected
- During large-scale removal projects to protect workers
- As ongoing monitoring in occupied buildings where ACM remains in place
Your surveyor can advise whether air monitoring is appropriate for your specific situation.
What should I tell tradespeople about asbestos at my property?
Property owners and landlords should provide any existing asbestos surveys, registers, and management plans to builders, electricians, plumbers, and other trades before work starts. This isn’t optional courtesy—it’s a legal requirement.
Under New Zealand health and safety law, persons conducting a business or undertaking (PCBUs) must inform workers about known or likely asbestos risks on site. This obligation flows through from property owners to contractors and subcontractors.
If there’s no current asbestos information for a pre-2000 building, arrange testing before significant intrusive work begins. Never ask tradespeople to drill, cut, or demolish unknown materials “just to see what happens.” This approach exposes workers to potential harm and exposes you to significant liability.
For further information on your obligations, contact WorkSafe NZ or consult with a qualified asbestos professional who can assess your specific situation and provide tailored guidance. You can also review our editorial guidelines for more on how we ensure reliable and accurate asbestos information.
Why should I hire a reputable asbestos contractor?
A reputable asbestos contractor can help you manage asbestos safely in your home or property. They ensure that any asbestos-related work is done correctly, minimizing health risks and legal liabilities.
How do I choose the right asbestos contractor?
Take your time to select a contractor you feel comfortable with. Look for qualifications, experience, and a track record of safe, high-standard asbestos management. A good contractor will provide a formal quote or work plan detailing the scope of work and conduct a thorough risk assessment before starting.
What services do asbestos contractors provide?
Asbestos contractors often specialise in specific areas such as surveying, sampling, or removal. They can help identify asbestos-containing materials, assess risks, and safely manage or remove asbestos as required.
What information should I prepare before contacting an asbestos contractor?
Be ready with details about your property, including its age, previous renovations, and any known or suspected asbestos locations. This information helps the contractor plan their assessment and testing efficiently.
Is it legal to dispose of asbestos in household rubbish?
No. Disposing of suspected asbestos in household rubbish is illegal. Only licensed contractors can dispose of asbestos waste at authorised landfills following strict regulations.
What are landlords’ legal obligations regarding asbestos?
Since April 2018, landlords must have an asbestos management plan that includes a register of all materials potentially containing asbestos. This ensures tenant safety and compliance with health and safety laws.
How should I protect my household if asbestos is suspected?
Inform everyone in your home about the suspected asbestos to prevent accidental exposure. Keep children and pets away from affected areas and avoid disturbing any suspect materials.
What should I do if asbestos is accidentally disturbed?
Follow specific safety procedures immediately, including isolating the area and contacting a professional asbestos contractor for advice and cleanup.
Are all forms of asbestos harmful?
Yes. All forms of asbestos are harmful to human health if fibres become airborne and are inhaled.
How much does asbestos sampling cost in Auckland?
Sampling services typically start around $299.95 + GST, but costs can vary depending on the property size and number of samples needed.
Is asbestos testing mandatory for buildings built before 2000 in Auckland?
Yes. Buildings constructed before 2000 are often suspected of containing asbestos. Testing is a legal requirement before demolition or refurbishment work begins.
Where can I get help with asbestos testing in Auckland?
While Auckland Council Environmental Health does not provide testing services, they offer guidance on identifying and disposing of asbestos. Private asbestos services available in Auckland include Consultex Environmental, Healthy Homes NZ, and Jim’s Building Inspections.
Who can certify a property safe after asbestos removal?
Only independent asbestos assessors can certify that a property is safe for reoccupancy following asbestos removal.
Can I collect asbestos samples myself?
No. Asbestos sampling should only be done by a reputable and trained contractor to prevent health risks and ensure valid results.
What do the Asbestos Regulations require before starting work that might disturb asbestos?
The regulations require that all asbestos likely to be disturbed must be identified and removed, as far as reasonably practicable, before work begins to protect health and safety.
Conclusion
Getting asbestos tested is a crucial step in protecting your health, your family, and anyone involved in property work. Proper testing by qualified professionals ensures accurate identification of asbestos-containing materials and helps you comply with New Zealand’s strict health and safety regulations. Whether you are renovating, managing a rental, or simply concerned about potential asbestos exposure, following the right procedures—from recognising suspect materials to engaging licensed contractors and understanding your test results—will help you manage asbestos risks effectively and safely. Always prioritise professional asbestos sampling and analysis over DIY methods to avoid health hazards and legal complications. With the right approach, you can confidently maintain a safe environment and meet your legal obligations with peace of mind.